Yes sir, you can achieve this using AlgoDelta JSON Bridge's Strategy Order functionality.
You can configure separate JSON syntaxes for BUY, SELL, and EXIT signals, along with your required ATM, ITM, or OTM option selection.
Follow these steps to configure the complete setup.
Step 1: Open Strategy Order in JSON Bridge
Navigate to:
JSON Bridge → Generate Syntax → Strategy Order
Here, you can configure the required option selection and generate separate JSON syntaxes for BUY, SELL, and EXIT.
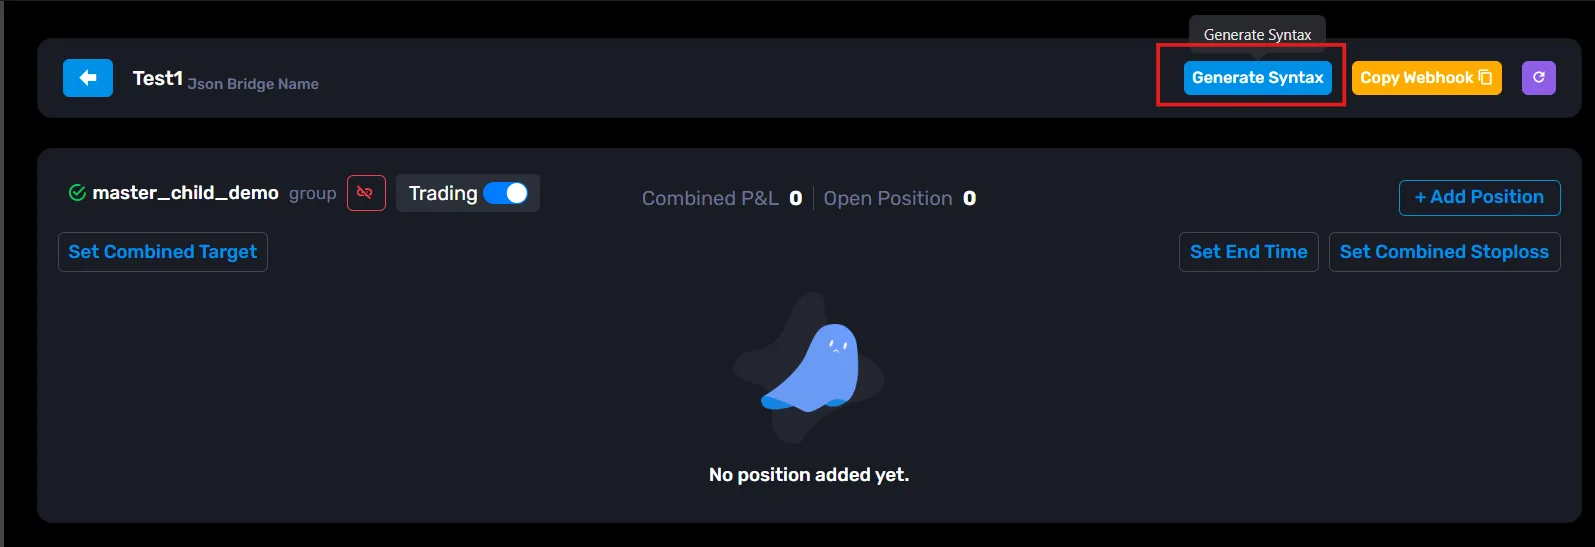
Step 2: Configure the BUY Side
First, configure the BUY side according to your requirements.
- Select the required option type and strike selection (ATM, ITM, or OTM).
- Configure the required expiry, quantity, and other order parameters.
- Set signal_type to UP.
Generate the BUY JSON syntax using this configuration.

Step 3: Configure the SELL Side
Now configure the SELL side.
- Select the required option type and strike selection (ATM, ITM, or OTM).
- Configure the required expiry, quantity, and other order parameters.
- Set signal_type to DOWN.
Generate the SELL JSON syntax.
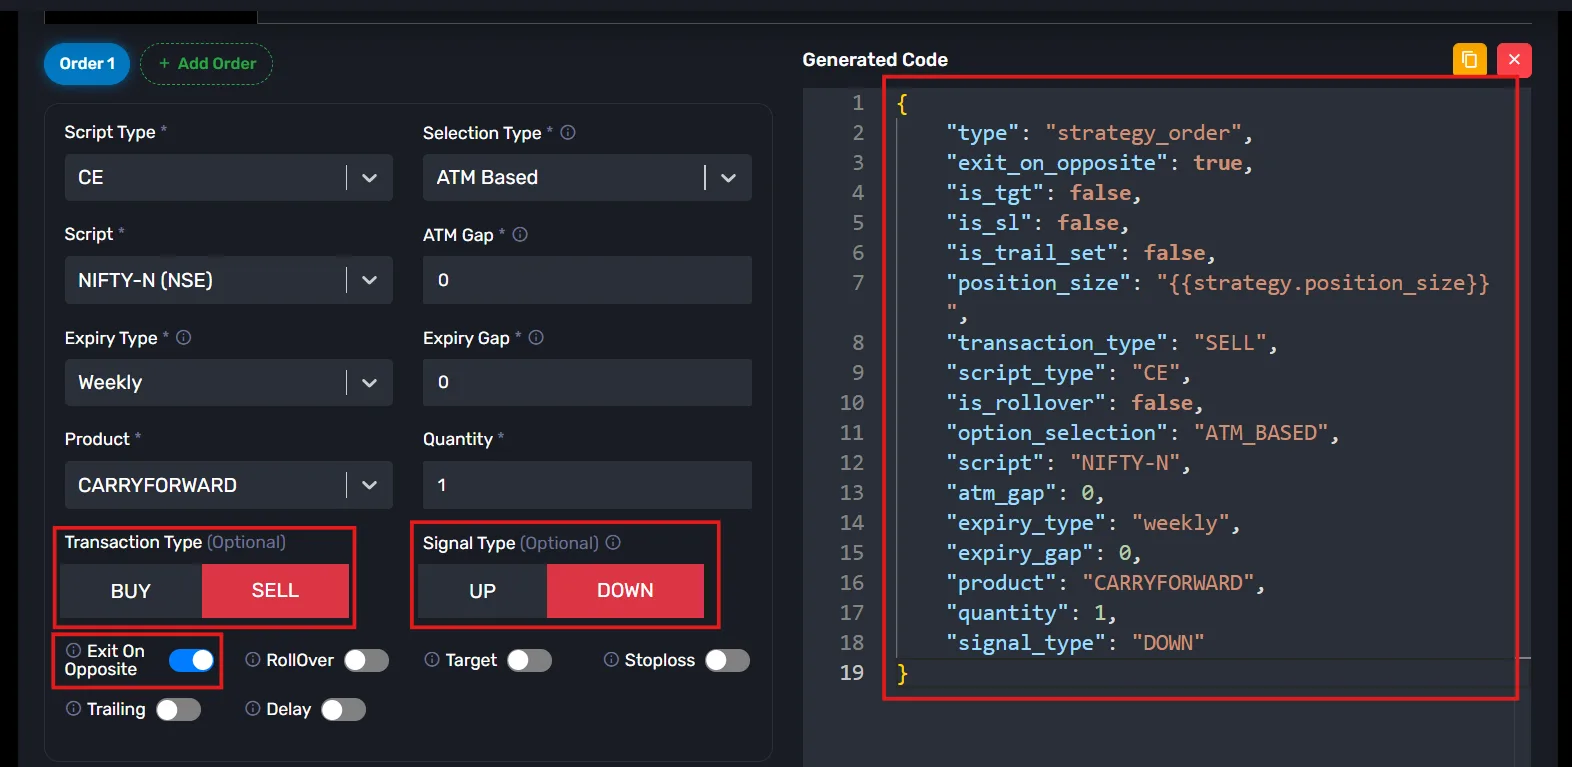
Step 4: Configure the EXIT Syntax
Now generate the third JSON syntax for your EXIT signal.
In this configuration, set:
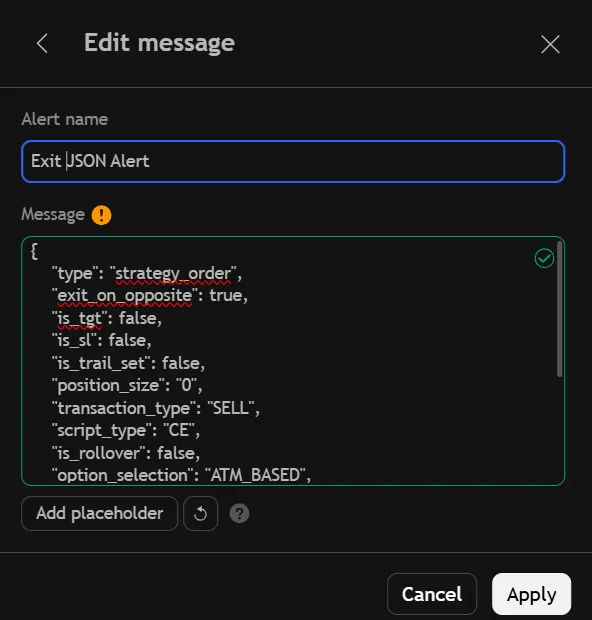
"position_size": "0"
Keep position_size as a string with the value "0".
The transaction type and signal type do not matter for this EXIT configuration. The important parameter is position_size.
Whenever AlgoDelta receives a JSON payload with position_size set to "0", it will square off all open positions.
Generate the EXIT JSON syntax.
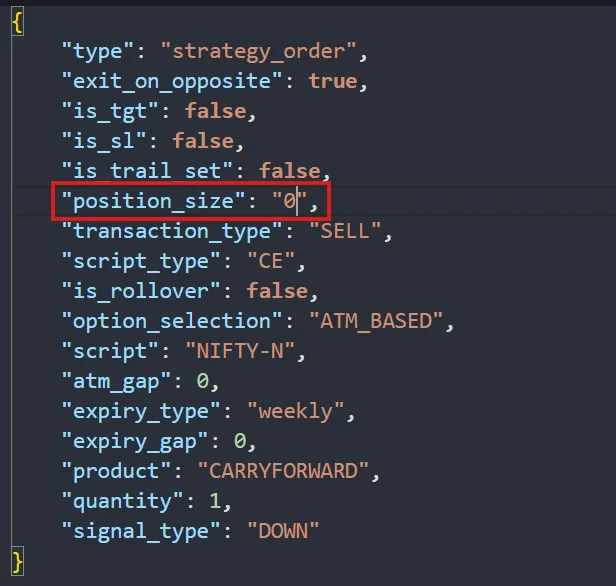
Step 5: Save All Three JSON Syntaxes
Once you have configured the BUY, SELL, and EXIT sides, generate and save all three JSON syntaxes.
You will use these separate syntaxes in your TradingView alerts.
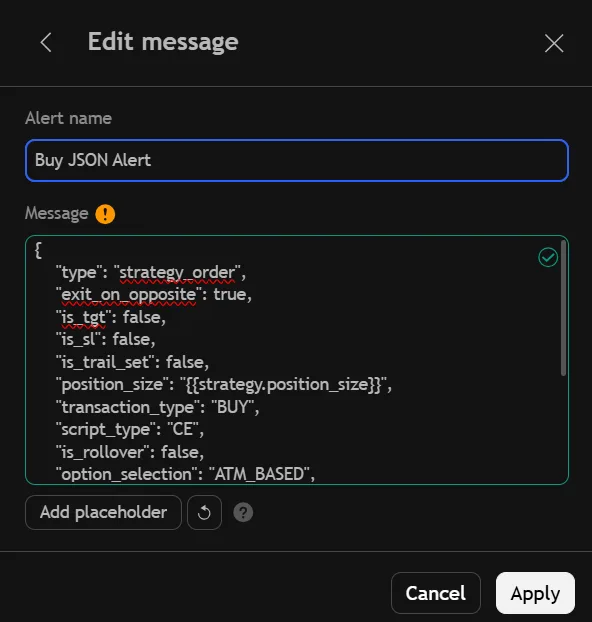
Step 6: Create the BUY Alert in TradingView
Open your TradingView indicator and create a new alert.
Select your indicator's BUY alertcondition (or the corresponding BUY alert name you have configured).
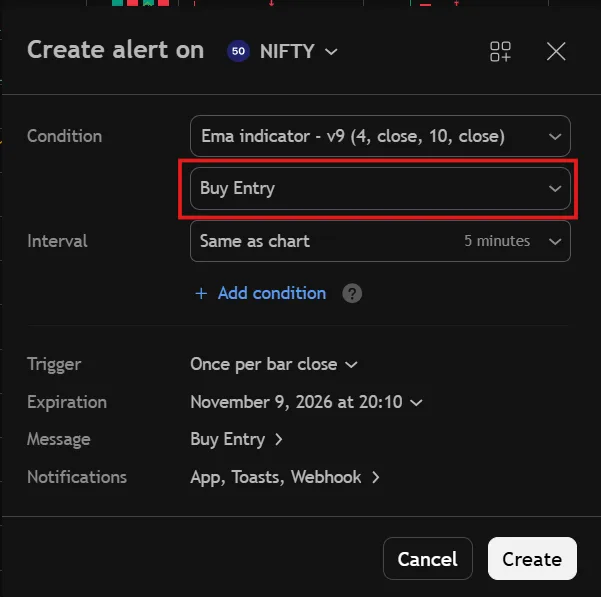
In the Message field, paste the BUY JSON syntax generated from AlgoDelta.
Step 7: Create the SELL Alert in TradingView
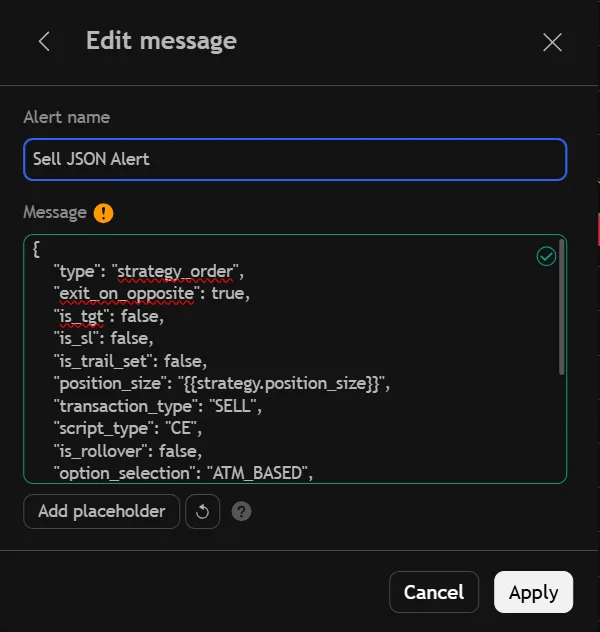
Create another alert for your indicator.
Select the SELL alertcondition and paste the SELL JSON syntax into the Message field.
Step 8: Create the EXIT Alert in TradingView
Create the third alert.
Select the EXIT alertcondition and paste the EXIT JSON syntax containing "position_size": "0" into the Message field.
Step 9: Connect All Three Alerts to AlgoDelta
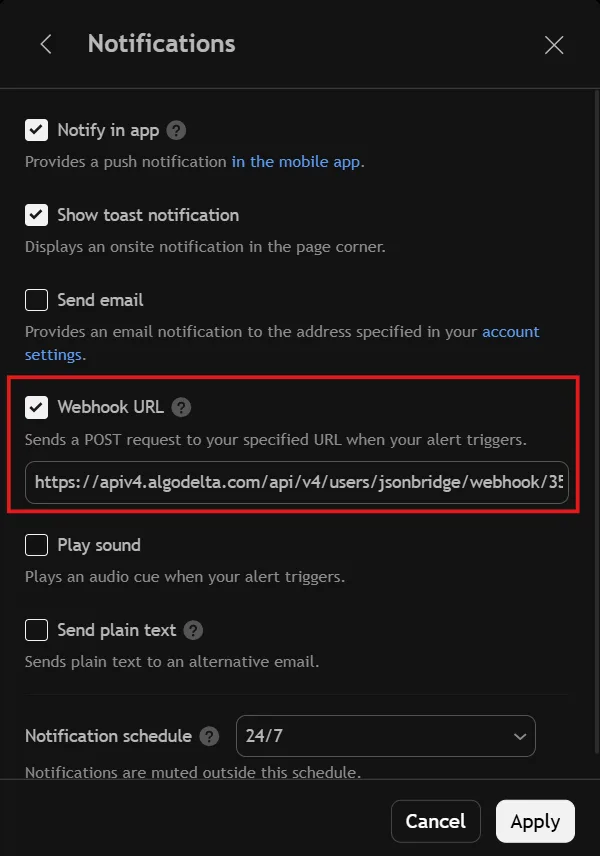
Copy the webhook URL from AlgoDelta JSON Bridge.
Open the Notifications section while creating each TradingView alert and enable the Webhook URL option.
Paste the same AlgoDelta webhook URL into all three alerts and save them.
How It Works
Once everything is configured, your complete workflow will work as follows:
BUY Signal: When your indicator generates a BUY signal, TradingView sends the BUY JSON to AlgoDelta, and the configured option BUY order is executed.
SELL Signal: When your indicator generates a SELL signal, TradingView sends the SELL JSON, and the configured option SELL order is executed.
Opposite Signal: Exit on Opposite Signal handles the configured opposite-side square-off before the opposite-side trade is executed.
EXIT Signal: When your indicator generates an EXIT signal, TradingView sends the EXIT JSON containing "position_size": "0", and AlgoDelta squares off all open positions.
This way, you can automate ATM, ITM, and OTM options trading with BUY, SELL, opposite-signal exits, and complete position square-off using your existing TradingView indicator and AlgoDelta JSON Bridge Strategy Order.
Important: Make sure you configure the correct option type, strike selection, expiry, quantity, and product settings in each JSON syntax. Test all three signals and opposite-side execution in paper trading before enabling live orders.